
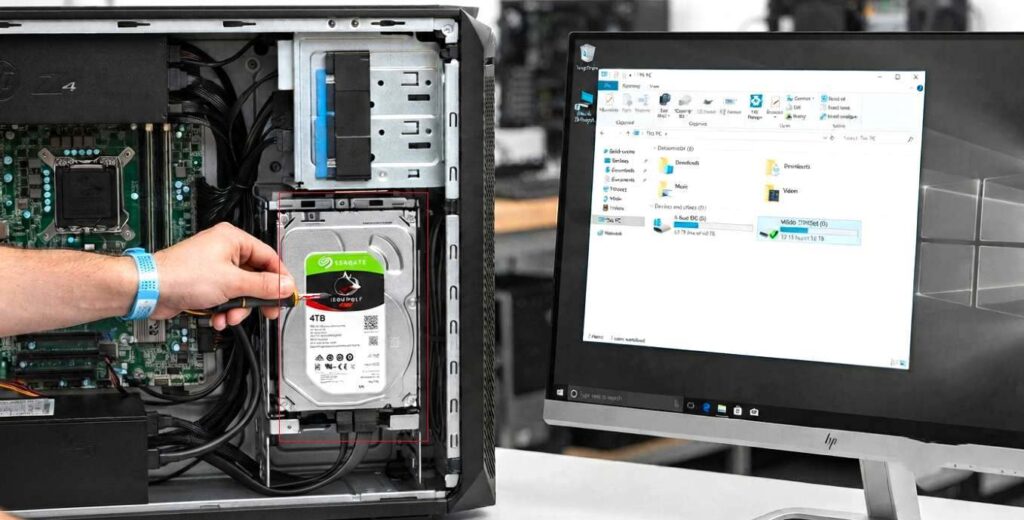
Learn how to install a hard disk (HDD) in a workstation CPU, including tools required, step-by-step as Real installation, BIOS setup, and how to verify the new drive using Windows and Linux commands and b also by directly.
1. Introduction :-
If you’re looking to Practical safely with to used ESD protection to install a hard disk (HD)in a workstation, this complete hard disk installation technical Real Demonstrate Practical you finished every stage — from unboxing the drive to confirming it’s working. Whatever your requirement for workstation hardware upgrade or RAID, Software Deployment drive storage upgrade or secondary hard disk setup (as additional) alongside an existing boot drive as well performance the primary process for how to install HDD hardware stays mainly the same across Desktop and workstation of any MFG Brand/vendors.
However, some smart concept to need also consider and process to be take when you starting to internal HDD installation steps, BIOS/UEFI recognition, and — most important Pont to be thought in mind to see as Virtual — how to verify new hard Disk installation using real commands in both Windows and Linux along with pictures for more understand and clarity.
How and what impact on your system after upgrade additional HD !
2.Types of Hard Disks Used in Workstations((WS)) :-
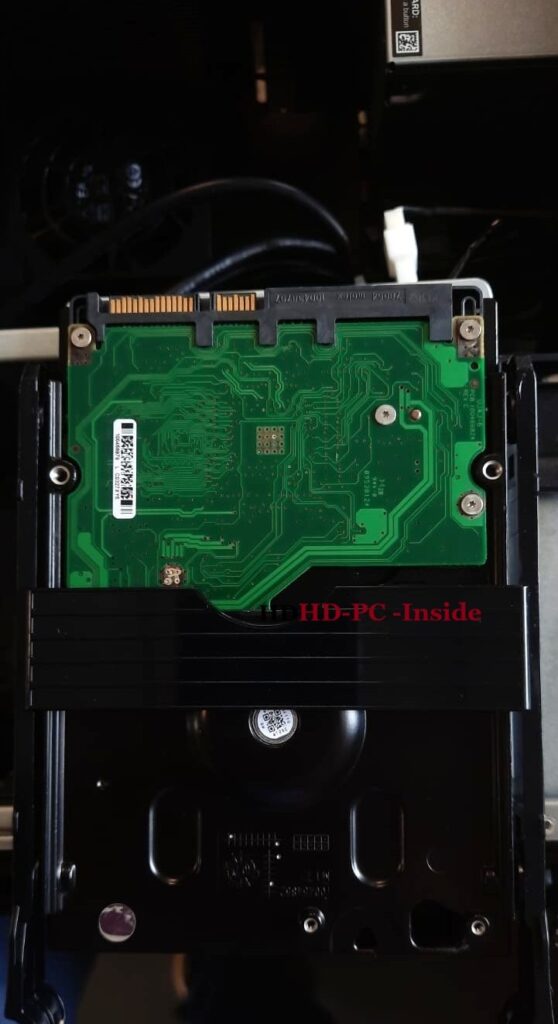
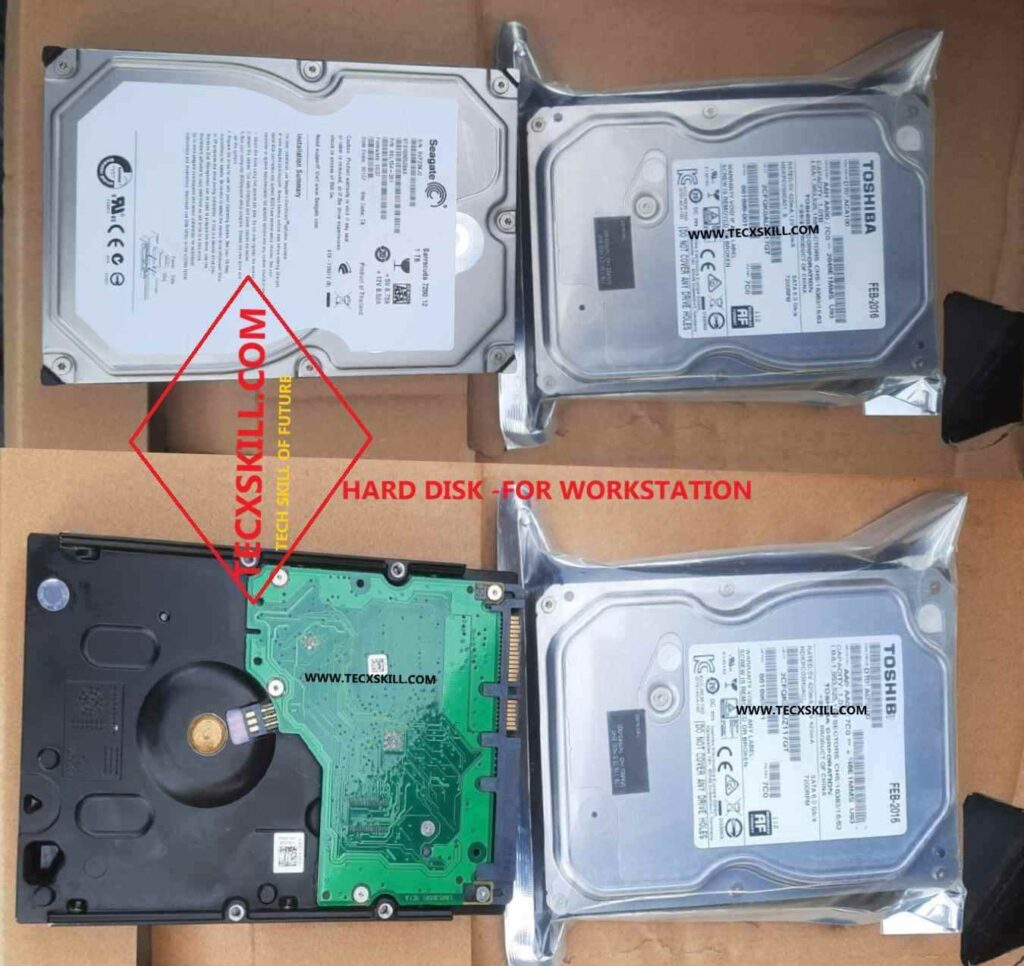
Before starting a hard disk installation, it is useful to know the type and interface, your workstation supports, since this determines the cables and BIOS settings settings you will use to work
- SATA HD.
Interface: SATA III (6 Gbps) and where use- Standard desktop/workstation storage.
- SAS HD.
Interface: SAS connector and where use – Project workstations/servers.
- NVMe/SSD (M.2)
Interface: PCIe and where use- High-speed boot drives (we know that HDD very slow if you installed WS or PC)
Tips:
Most home and office systems use SATA HDDs, which is why the majority of this used add new hard drive to PC focuses on SATA-based installation and verification and performance and performance and startup and restart times.
3.Safety Precautions Before You Start :-
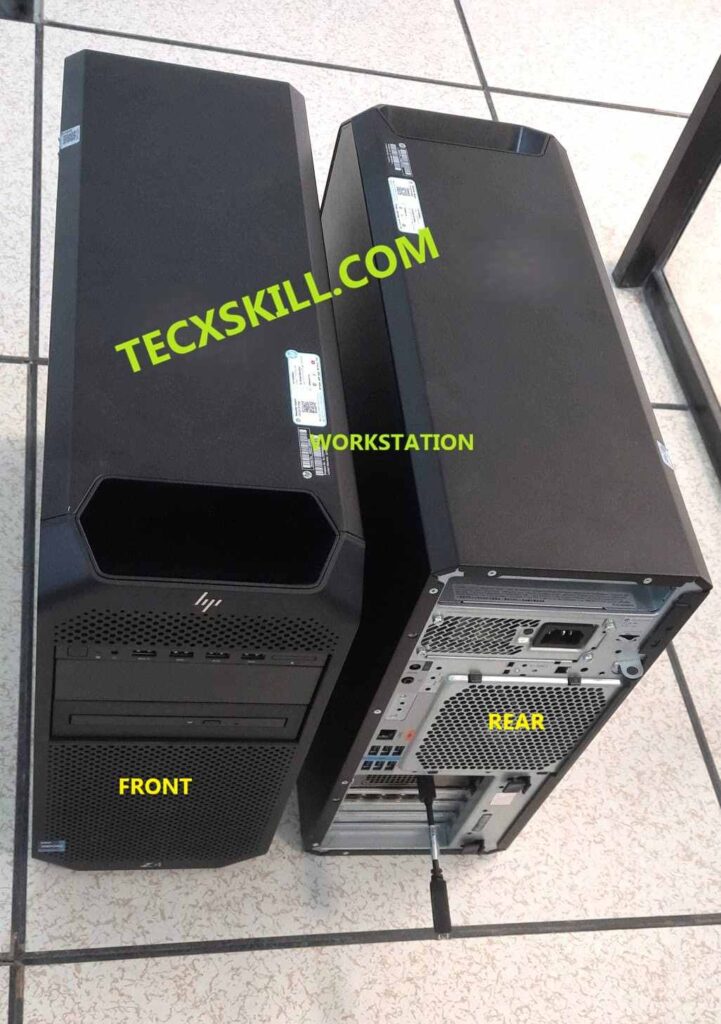
1. Power off (by OS Shut Down and then Hard power off if not possible) and Unplug Power cord for WS to avoid the crass or loss Tools.
2. Press the power button(6s) once after unplugging (Min 6-10 Sec) to discharge residual electricity.
3. Wear an anti-static wrist strap or touch a grounded metal part of the case to avoid ESD damage of HD.
4. Workstation and Work on a flat, static-free surface.
4.Step-by-Step Hard Disk Installation Process with Visual pictures :-
The following installing an internal hard Disk (HD) apply to most computer cases and workstations cabinets. They allow you to insert and remove HD (as fig.) from any brand into the slot without causing damage.
Step 1: Open the Cabinet to see attached picture.
Remove the side panel screws or slide/lift off the side cover to expose the internal HD slot.
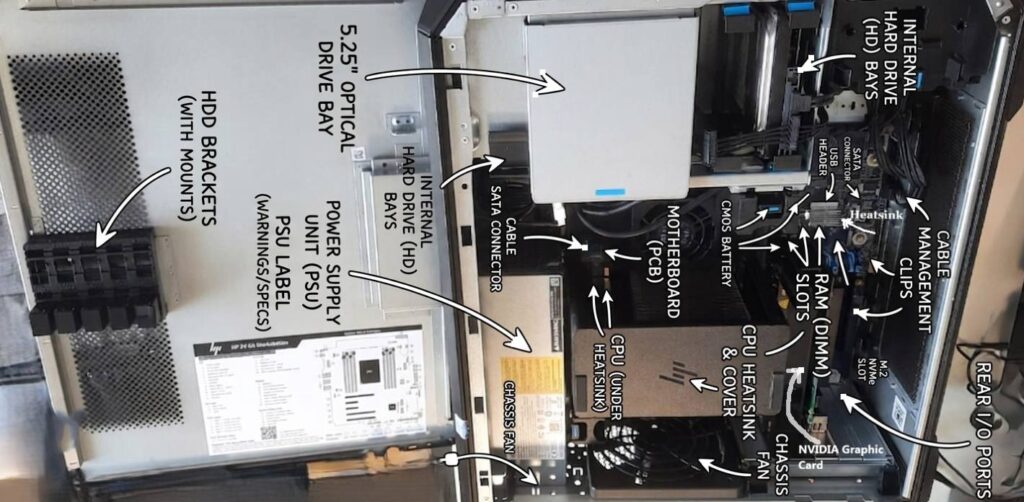
Step 2: Locate the Disk Bay slot
Locate an empty, installed HD bay slot; this is usually situated near an existing hard drive, at the front of the case, or within a dedicated disk cage (as shown in the image).
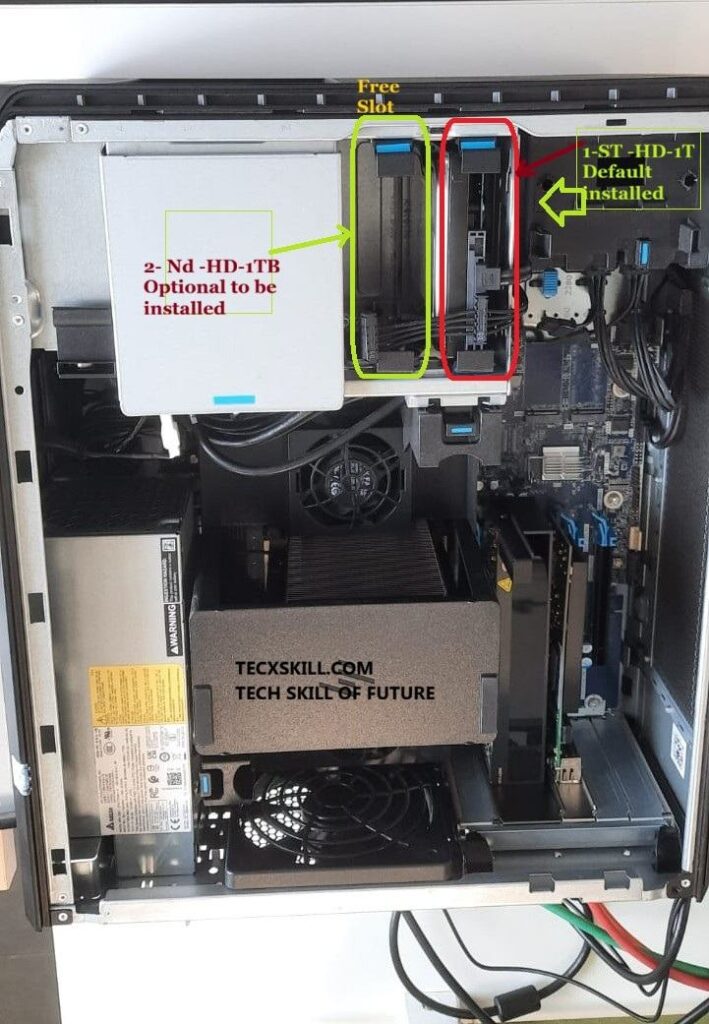
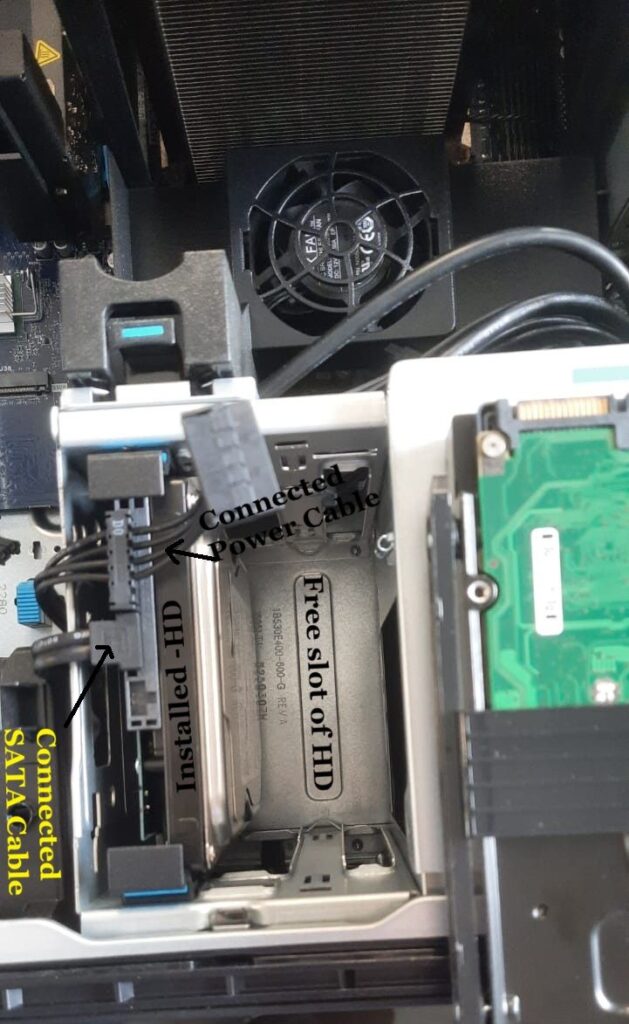
Step 3: Mount the Hard Disk in the free slot
Pull the HD slot and insert HD into slot as hook to screw slot then pull then hard disk into free Disk slot as show fig below.
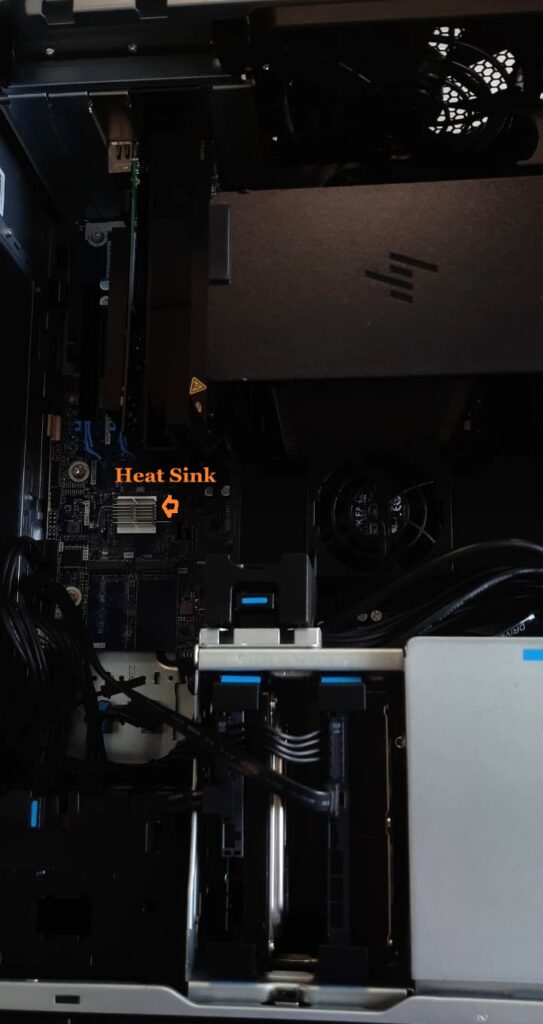
Step 4: Connect the SATA Data Cable
Connect Sata Cable to fixed in SATA slot into hard Disk and other end connect to workstation (usually labelled SATA0, SATA1) as SATA port on the motherboard slot as show in fig.
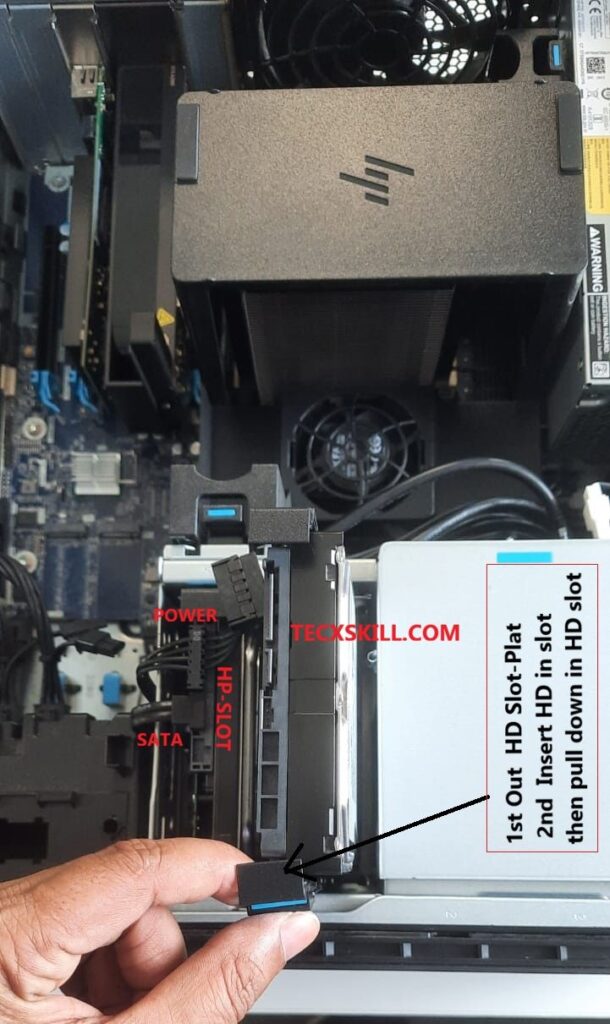
Quick Tips: just follow installed HD and connection.
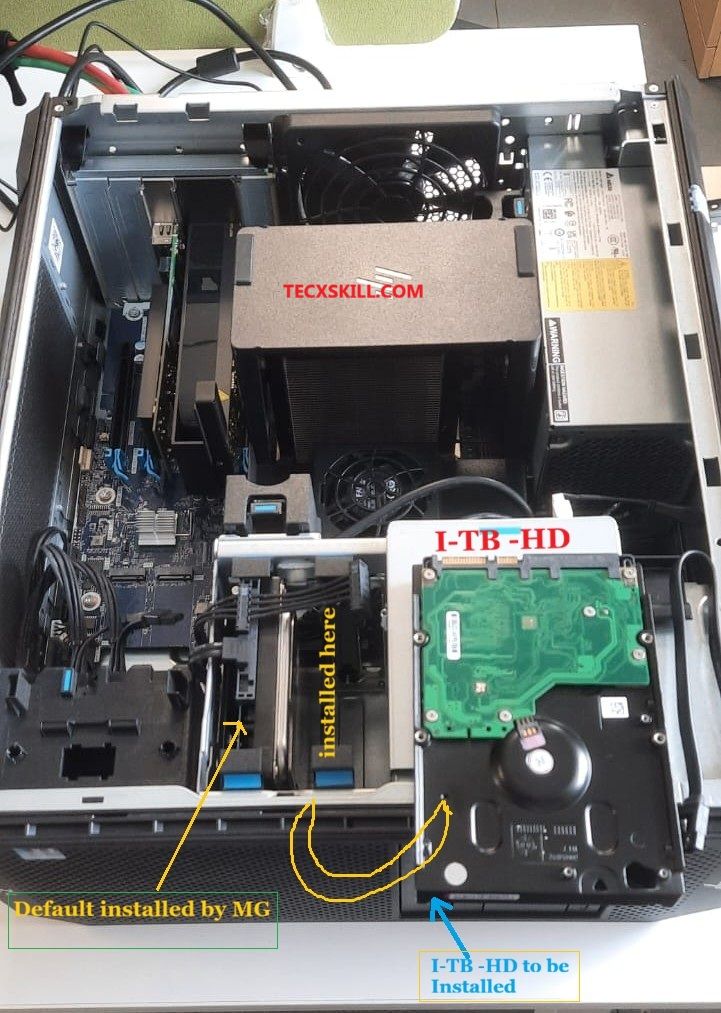
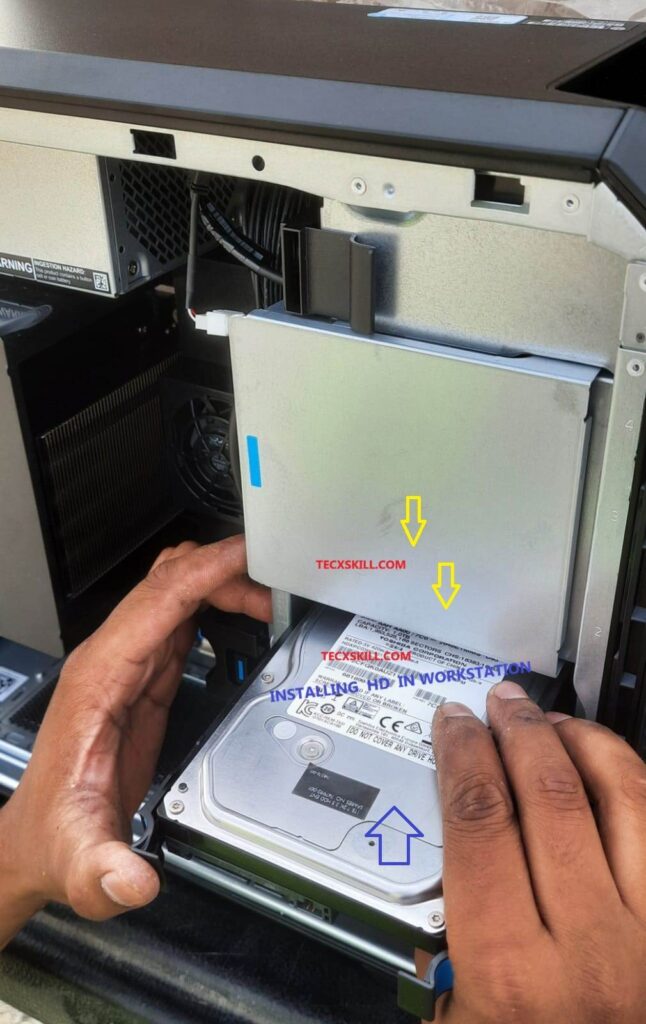
Step 5: Connect the Power Cable
To Connect a SATA power connector from the PSU (power supply unit of WS) to the hard disk’s power port or already connected existing Hard Disk and one SATA end free (usually free extinction) as show in picture.
Step 6: Cable Management and tidy connected
To Check all cables properly and secure them using zip ties or the case’s cable routing channels to maintain airflow.
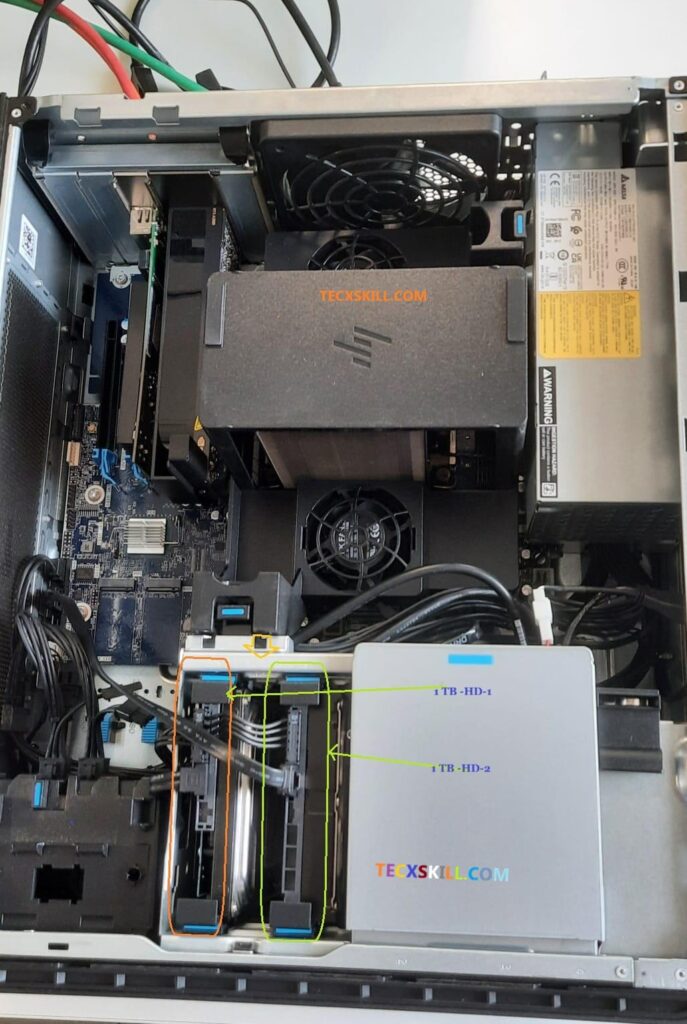
Step 7: Close the Cabinet
Reattach the side panel and secure as is it as show picture
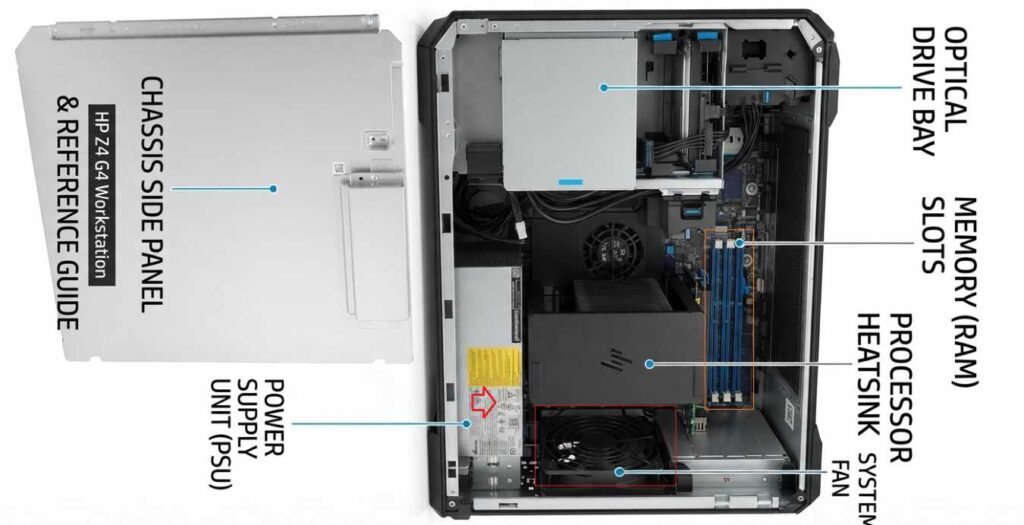
Step 8: Power On
Plug in the power Cord cable and switch on the workstation.
5.Verifying the Hard Disk in BIOS/UEFI :-
Once the Hard Disk is physically installed, the first checkpoint as visual for whether the disk is detected in BIOS happens before the operating system even loads.
To follow BIOS check
1.Restart the workstation and press the BIOS key (commonly Del, F2, F10, or Esc
depending on the motherboard brand MFG).
2. Navigate to go on Storage Configuration or SATA Configuration
3. Confirm the new hard disk is listed with its model number and capacity to see as virtual storage capacity mache or not
4. Save and exit (usually F10).
What happen if new installed HD not detected or showing in BIOS then check all connection and Hard reboot WS and again check also check HD support interface.
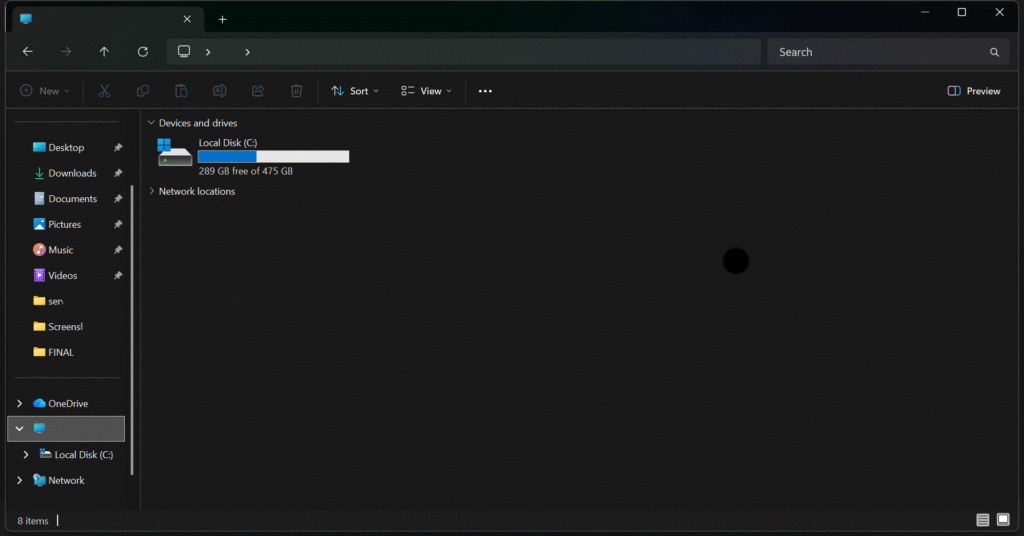
6.How to Check the Hard Disk Using Commands for Linux and Windows :-
This is the most important part for anyone to learn who wants to check hard disk command-line output rather than depend on on the GUI alone. Both Windows and Linux offer built-in tools to confirm the drive is present, Status, healthy, and ready to use.
1. On Windows and PowerShell — diskpart, wmic, and Get-Disk
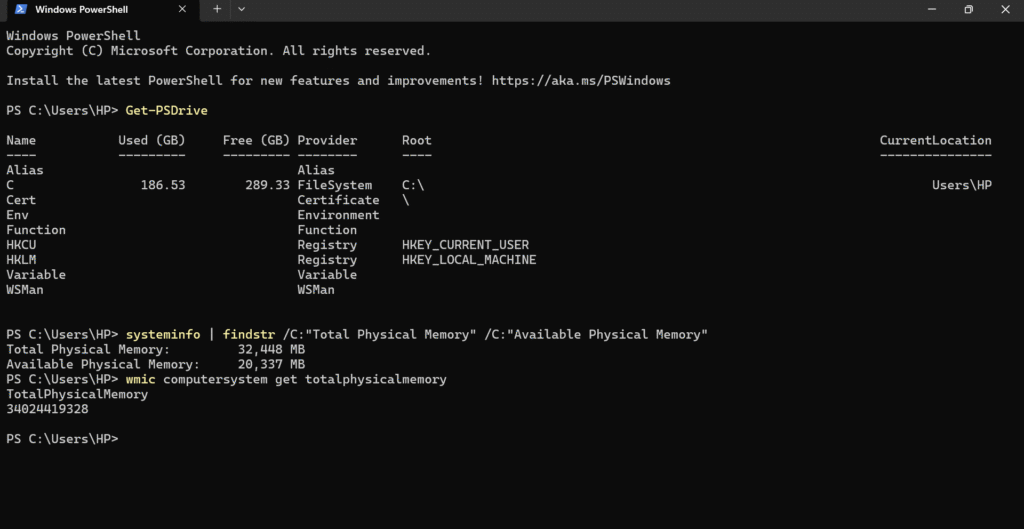
A. Using Disk Management (GUI-based) for quick check
Short cut key: Win + X → Disk Management
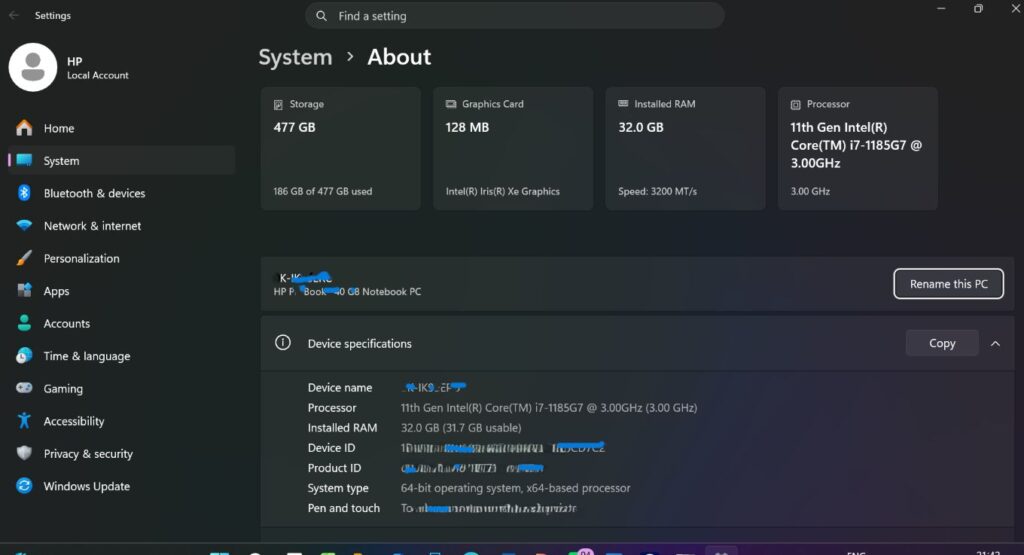
B. Check disk health status (SMART data)
2. On Linux —df -h, du-sh ,lsblk, fdisk, and smartctl.
After executing then prompt command then see below visual details of storage and List detailed disk information.
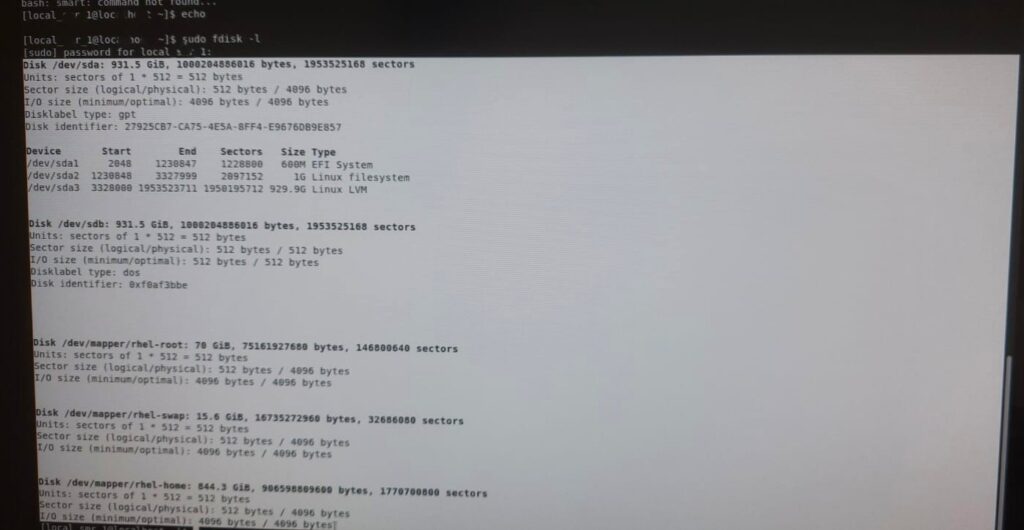
C. Check disk info via /dev -Tools
Newly added SATA disks typically appear as /dev/sdb, /dev/sdc, etc.
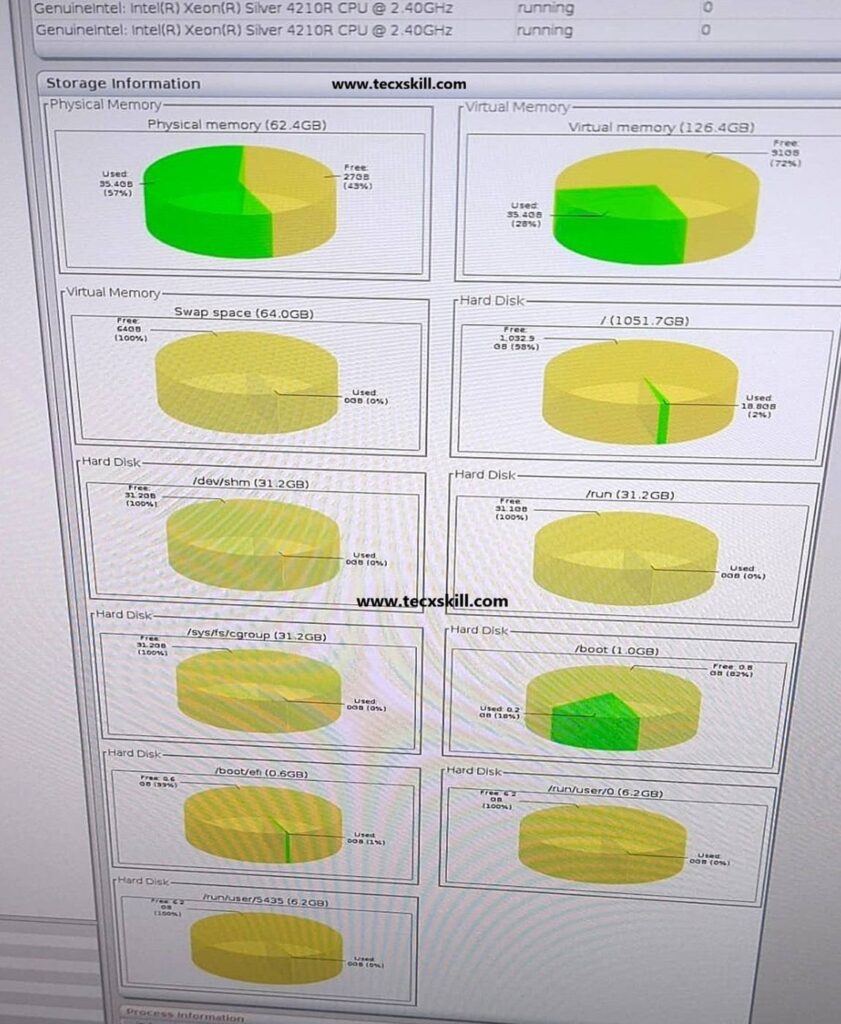
D. Check kernel messages for hardware detection
dmesg | grep -i sd
7.Common Issues & Troubleshooting:–
Check and tick <>
Disk not detected in BIOS
Disk detected but not in OS
Initialize via Disk Management