
Video Editing — Basic to Advanced
in this Tutorial modules to guide explaining the entire editing process. it covers formats, cutting, timeline creation, audio,Noice removed ,UHD , color correction, exporting, and AI-supported integration and workflows—with every step visually demonstrated.
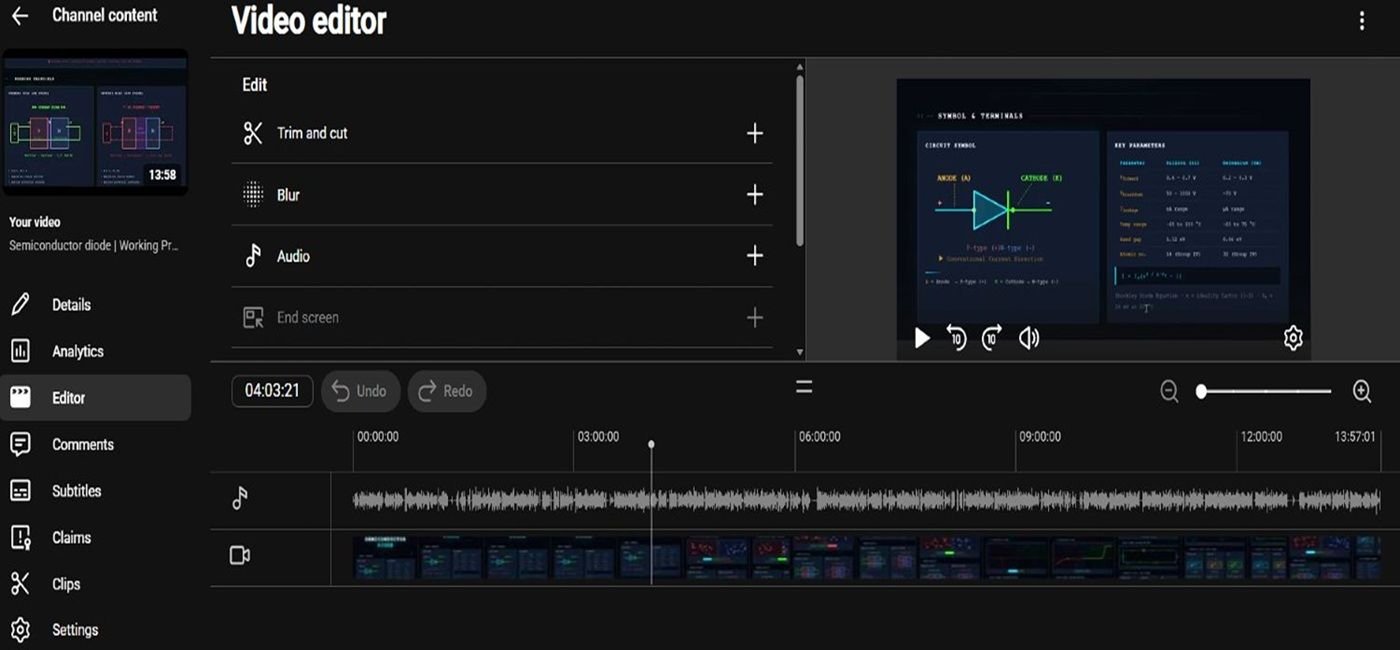 latest Videos Editing to create automation and fast with help of AI tools integration.
Foundations
Understanding Video Formats & Resolutions Basic
Every edit begins with knowing what you’re working with — container, codec, resolution, and frame rate all decide how footage behaves in the timeline.
- Container vs Codec — a container (.mp4, .mov, .mkv) holds video, audio and metadata; the codec (H.264, ProRes, DNxHR) is how the picture data is compressed inside it.
- Resolution ladder — SD (720×480) → HD (1280×720) → Full HD (1920×1080) → 4K UHD (3840×2160) → 8K (7680×4320). Higher resolution = more reframing room, bigger files.
- Frame rate choice — 24fps for cinematic feel, 25/30fps for broadcast/social, 50/60fps for sports and slow-motion source material.
- Bitrate & compression — higher bitrate preserves detail in motion and shadows but increases file size; match bitrate to delivery platform.
- Aspect ratio — 16:9 for YouTube/TV, 9:16 for Reels/Shorts, 1:1 for feed posts. Decide the ratio before shooting or reframing.
Introduction to Adobe Premiere Pro Interface Basic
The workspace is a set of Nested panels — learn what each does and increase editing speed follows naturally.
- Project Panel — bin for all imported clips, sequences and graphics.
- Source Monitor — preview and trim a clip before it enters the timeline.
- Program Monitor — shows the actual timeline output.
- Timeline Panel — where video/audio tracks are arranged and edited.
- Tools Panel — Selection, Razor, Slip, Slide, Ripple/Roll-edit tools.
- Effects & Effect Controls — apply and keyframe transitions, filters, motion.
Organizing Assets & Media Management Basic
A good folder (bin) structure is invisible when it exists and causes headaches when it doesn’t—organize it before you start working on the timeline.
- Folder structure — create bins: 01_Footage, 02_Audio, 03_Graphics, 04_Sequences, 05_Exports.
- Renaming & labels — rename clips descriptively; color-label by scene, camera, or type.
- Proxies — generate low-res proxies for 4K/RAW footage to edit smoothly on modest hardware.
- Metadata & markers — log good takes, shot type, and notes so search replaces scrubbing.
- Project consolidation — use File → Project Manager to collect and trim used media before archiving/delivery.
Basic Cutting & Trimming Techniques Basic
Cutting is the atomic unit of editing — master the four core trims before anything else.
- Insert (,) vs Overwrite (.) — Insert pushes later clips forward; Overwrite replaces frames at the playhead.
- Razor tool (C) — split a clip at the playhead into two independent segments.
- Ripple trim — trimming an edge shifts all downstream clips to close the gap.
- Roll edit — moves the cut point between two adjacent clips without changing total duration.
- Slip & Slide — Slip changes in/out points inside a clip without moving it; Slide moves the clip and adjusts neighbors.
Q (ripple trim previous edit to playhead) and W (ripple trim next edit) for fast keyboard-only trimming.Editing Craft
Working with the Timeline Basic
The timeline is a stack of tracks read left-to-right — understanding track priority and sync is essential.
- Track stacking — higher video tracks (V2, V3…) visually cover lower ones (V1) unless blended or keyed.
- Linked clips — video and its native audio stay linked; unlink only when intentionally replacing audio.
- Snapping (S) — toggle snap so clip edges and the playhead lock together for gap-free cuts.
- Nesting — group a sequence of clips into a single nested clip to apply one effect to all of them.
- Markers — drop markers (M) to flag beats, sync points, or notes for collaborators.
Narrative vs Montage Editing Basic
Two structural philosophies decide pacing: continuity-driven narrative vs rhythm-driven montage.
- Narrative editing — cuts serve story causality and continuity (eyelines, 180° rule, match-on-action).
- Montage editing — cuts compress time/emotion through juxtaposition, often set to music, prioritizing rhythm over literal continuity.
- Pacing control — shorter average shot length raises energy; longer holds build tension or intimacy.
- Transitions — hard cuts for narrative clarity; cross-dissolves or match-cuts for montage flow.
- When to mix — use short montage inserts inside a narrative scene to compress travel or training sequences.
Multi-camera Editing Techniques Advanced
Cut between synchronized camera angles live, like a broadcast switcher, instead of manually aligning each cut.
- Sync sources — sync by timecode, audio waveform, or a clap/marker before creating the multicam clip.
- Create Multi-Camera Source Sequence — right-click selected clips → Create Multi-Camera Source Sequence.
- Switch in Program Monitor — enable multicam view, then click camera angles live while playing to cut in real time.
- Fine-tune cuts — trim individual angle cuts afterward exactly like any timeline edit.
- Flatten (optional) — flatten to a standard sequence only once angle choices are final, for easier export/color.
Speed Ramping & Slow Motion Advanced
A speed ramp accelerates or decelerates playback rate over time inside one clip for dramatic emphasis.
- Shoot for it — record at a high frame rate (60/120fps) so slow sections stay smooth after retiming.
- Time Remapping — right-click clip → Time Remapping → Speed, then add keyframes on the speed line.
- Ease in/out — drag keyframe handles into smooth curves rather than instant jumps, for a cinematic ramp.
- Optical Flow — set Time Interpolation to Optical Flow for smoother slow-motion frame generation.
- Sync audio separately — detach and re-time audio manually, since pitch/tempo shifts unnaturally with raw speed changes.
J-Cuts & L-Cuts for Professional Flow Advanced
Split edits stagger audio and video cut points so scenes flow instead of hard-jumping.
- J-Cut — the next scene’s audio starts before its picture, easing the viewer into the new scene.
- L-Cut — the current scene’s audio continues after its picture cuts away, letting dialogue bridge two shots.
- Unlink A/V — select linked clip → right-click → Unlink, or drag the audio edge alone while holding the trim tool.
- Use for reaction shots — L-cut to a listener’s face while the speaker’s dialogue continues underneath.
- Keep sync markers — leave a marker at the original sync point in case you need to realign later.
Using Keyframes for Motion Advanced
Keyframes store a property’s value at a point in time; Premiere interpolates every frame between them.
- Toggle animation — click the stopwatch next to Position/Scale/Rotation/Opacity in Effect Controls to start keyframing.
- Set values over time — move the playhead, change the value, and a new keyframe is added automatically.
- Interpolation types — Linear (mechanical), Bezier (smooth ease), Hold (instant jump-cut motion).
- Ease in/out — right-click a keyframe → Ease In/Out for natural acceleration and deceleration.
- Graph editor — open the Graph Editor for precise curve shaping beyond the basic keyframe row.
Transitions: Cuts, Dissolves & Wipes Basic
A transition is a promise to the viewer about how two shots relate in time and space — choose it deliberately, not by default.
- Hard cut — instant change, the default and most invisible transition; use for continuous time and energy.
- Cross-dissolve — one shot fades into the next, signaling a passage of time or a softer emotional link.
- Wipe / push — one shot displaces another across the frame; reads as stylized or chapter-like, common in vlogs and montage.
- Match cut — cut on similar shape, motion or composition between two shots for a seamless, clever join.
- Duration discipline — keep dissolve/wipe durations short (6–15 frames) unless a slow fade is the intended emotional beat.
- Don’t transition-stack — one deliberate transition per cut; layering multiple effects reads as amateur.
Titles, Lower Thirds & Motion Graphics Basic
Text on screen must be legible instantly and disappear before it overstays its purpose.
- Essential Graphics panel — build titles and lower thirds with the Type/Shape tools, then save as a reusable Motion Graphics Template (.mogrt).
- Legibility first — high contrast against background, a safe-margin zone, and a readable hold time (roughly 1 second per 3 words minimum).
- Lower thirds — name/title graphics placed in the lower third of frame, process in/out with a short slide or fade.
- Animate with keyframes — position/opacity/scale keyframes (see 2.6) drive in/out motion for any graphic layer.
- Consistency — reuse one font pairing, color palette and animation style for every title in a project.
- Safe zones — keep key text inside the title-safe area so it isn’t cropped on TVs or vertical/social crops.
Audio
Noise Reduction & Audio Cleaning Advanced
Clean dialogue is judged by what’s absent — hiss, hum, and room noise — not by loudness.
- Identify noise type — constant hiss, 50/60Hz electrical hum, wind rumble, or room reverb each need a different fix.
- DeNoise / DeHum — apply Essential Sound Panel’s Repair section or the DeNoise effect, dialing in only enough to clean without dulling the voice.
- High-pass filter — cut everything below ~80–100Hz on dialogue to remove rumble and hum.
- Noise print / learn — some tools sample a “noise-only” section to build a print, then subtract that print from the whole clip.
- A/B check — always compare treated vs untreated with fresh ears (or headphones) before committing.
Background Music & Voiceover Balancing Basic
Dialogue must always be intelligible — music supports emotion but never competes for attention.
- Reference levels — dialogue around -12 to -6dB, music bed 6–15dB below dialogue during speech.
- Ducking — automatically lower music when dialogue is present, using Essential Sound’s Ducking or manual keyframes.
- EQ carve — cut a small dip in the music’s 1–4kHz range (vocal presence band) so dialogue sits forward.
- Fades — always fade music in/out at the start/end of a scene rather than hard-cutting it.
- Final loudness check — target platform loudness standards (e.g. -14 LUFS for most streaming/social platforms).
Using Sound Effects (SFX) for Impact Advanced
SFX sell physical weight, transitions, and UI moments that picture alone can’t communicate.
- Categorize SFX — hard effects (footsteps, impacts), ambience (room tone, city), whoosh/transition, UI/interface stings.
- Layer for richness — stack 2–3 short SFX (e.g. a whoosh + a low sub-hit) rather than relying on one flat sound.
- Sync to action — snap SFX precisely to the frame of visual contact (a punch, a cut, a logo reveal).
- Pan & pitch variation — vary pan and pitch slightly across repeats so the same SFX doesn’t sound identical every time.
- Leave headroom — keep SFX peaks a few dB under 0dB so the master mix doesn’t clip.
Essential Sound Panel in Premiere Pro Basic
One panel to tag, fix, and balance every clip type — Dialogue, Music, SFX, Ambience — without hunting through individual effects.
- Tag the clip — select a clip and assign it a type: Dialogue / Music / SFX / Ambience.
- Dialogue tools — Loudness auto-match, Reduce Noise, Reduce Rumble, Repair, De-ess, all as simple sliders.
- Music tools — Duck Against Dialogue, auto-adjust for tone and duration.
- Loudness targeting — set a target LUFS and let Premiere auto-normalize dialogue consistently across clips.
- Clip vs Track mixer — use per-clip tags for quick fixes, then the Audio Track Mixer for overall balance and buses.
Audio Syncing Techniques Basic
When camera and external recorder audio are separate, alignment must be exact to the frame.
- Slate/clap method — align the visual clap spike with the matching audio transient spike.
- Timecode sync — jam-synced timecode between camera and recorder auto-aligns clips with zero manual work.
- Waveform auto-sync — select both clips → right-click → Synchronize → Audio, letting Premiere match waveforms automatically.
- Merge clips — combine synced video + external audio into one Merged Clip for simpler timeline handling.
- Verify at multiple points — check sync at the start, middle, and end of a long take — drift can creep in on longer recordings.
Color
Lumetri Color Panel Basics Basic
Lumetri is Premiere’s built-in color engine, organized top-to-bottom in the order you should actually use it.
- Basic Correction — white balance, exposure, contrast, highlights/shadows, whites/blacks, saturation.
- Creative — apply a look/LUT and adjust intensity, sharpen, fade, vibrance.
- Curves — RGB and Hue curves for precise tonal and color shaping.
- Color Wheels & Match — three-way wheels (shadows/midtones/highlights) plus an automatic shot-matching tool.
- HSL Secondary — isolate one color range (e.g. sky, skin) for a targeted adjustment.
- Vignette — subtle edge darkening to draw the eye to center frame.
Color Correction vs Color Grading Basic
Two different jobs, always in this order: fix the image, then style the image.
- Correction (technical) — neutralize white balance, normalize exposure, match contrast between cameras/shots.
- Grading (creative) — push a color palette or mood: warm/cool split-tone, teal-and-orange, desaturated, high-contrast filmic.
- Order matters — grading a wrongly-exposed or off-white-balance clip bakes the error into every creative choice after it.
- Reference the story — a thriller may want cool desaturation; a warm drama may want golden highlights — grade in service of tone.
- Check on multiple displays — verify the grade on at least a calibrated monitor and a phone screen before finalizing.
Working with LUTs (Look-Up Tables) Advanced
A LUT is a preset mathematical mapping from input color values to output color values — a starting point, not a finish line.
- Technical vs creative LUTs — technical (Log-to-Rec.709) converts flat log footage to a normal viewing range; creative LUTs stylize on top of that.
- Apply order — technical conversion LUT first (in Basic Correction’s Input LUT), creative LUT second (in Creative).
- Never apply to unbalanced footage — expose and white-balance correctly before a LUT, or colors shift unpredictably.
- Adjust intensity — dial back a creative LUT’s opacity/intensity rather than accepting it at 100%.
- Build your own — export a finished grade as a custom LUT to reuse across a project for consistency.
Matching Colors Between Different Clips Advanced
Multi-camera or multi-location footage must look like one continuous world, not a patchwork.
- Pick a reference shot — choose the best-exposed, most representative clip as your visual anchor.
- Use Color Match — Lumetri’s Color Wheels & Match tab can auto-analyze and match a target frame to the reference.
- Check scopes, not eyes alone — compare waveform luma and vectorscope hue/saturation between clips for objective matching.
- Fine-tune manually — nudge temperature/tint and shadow-midtone-highlight wheels after auto-match for a perfect blend.
- Grade in scene order — review matched clips back-to-back in the timeline, not in isolation, to catch mismatches.
Skin Tone Correction Advanced
Skin is the most scrutinized color in any frame — the human eye instantly detects an unnatural tone.
- Use the Vectorscope skin-tone line — natural skin tones fall along a diagonal reference line on the Vectorscope (YUV).
- Isolate with HSL Secondary — key the skin hue range with the eyedropper, then refine with the Denoise/Blur softening.
- Correct without over-saturating — small saturation/hue nudges only; oversaturated skin reads sunburnt or plastic.
- Match across faces/scenes — ensure every actor’s skin tone sits consistently near the reference line across the whole edit.
- Protect skin during creative grading — use a garbage matte or the isolated skin key so a strong overall grade doesn’t tint faces.
Advanced / AI
Export Settings & Delivery Specifications Basic
A great edit can still fail on delivery — match export settings to exactly where the video will play.
- Format & codec — H.264/MP4 for most web/social delivery; ProRes/DNxHR for archival or further post-production handoff.
- Match sequence settings — export resolution and frame rate should match (or intentionally downscale from) your sequence settings.
- Bitrate strategy — use VBR 2-pass for best quality-to-size ratio on final web/social masters; CBR for streaming-server predictability.
- Platform specs — YouTube (up to 4K, 16:9), Instagram/TikTok Reels (9:16, ≤90s–3min depending on platform), broadcast (specific codec/loudness delivery specs).
- Audio loudness — export audio normalized to the platform’s target LUFS (commonly -14 LUFS streaming, -23 LUFS broadcast EBU R128).
- Render verification — always play back the final export file (not just the timeline) before sending — encoding can reveal issues invisible in-app.
AI Tools Integration in Video Editing Advanced
AI now assists nearly every editing stage — used well, it removes repetitive labor and leaves creative decisions to the editor.
- Auto-transcription & captions — AI-generated Speech-to-Text creates searchable transcripts and auto-styled captions in minutes.
- Scene/shot detection — automatic scene-edit detection splits long raw footage into individual shots for faster logging.
- AI reframing — auto-reframe intelligently tracks subjects when converting 16:9 footage to 9:16/1:1 for social platforms.
- Generative fill & object removal — content-aware fill removes boom mics, rigs, or blemishes without manual rotoscoping.
- AI color & audio — auto color-match, auto-ducking, and voice enhancement apply first-pass fixes an editor then refines.
- Text-based editing — cut a rough sequence by deleting words directly in the transcript, and the timeline updates automatically.